By using this website you agree to our use of cookies. If you require more information or prefer not to accept cookies please visit our Privacy Policy >
GIGABYTE BIOS is back with an awesome new design
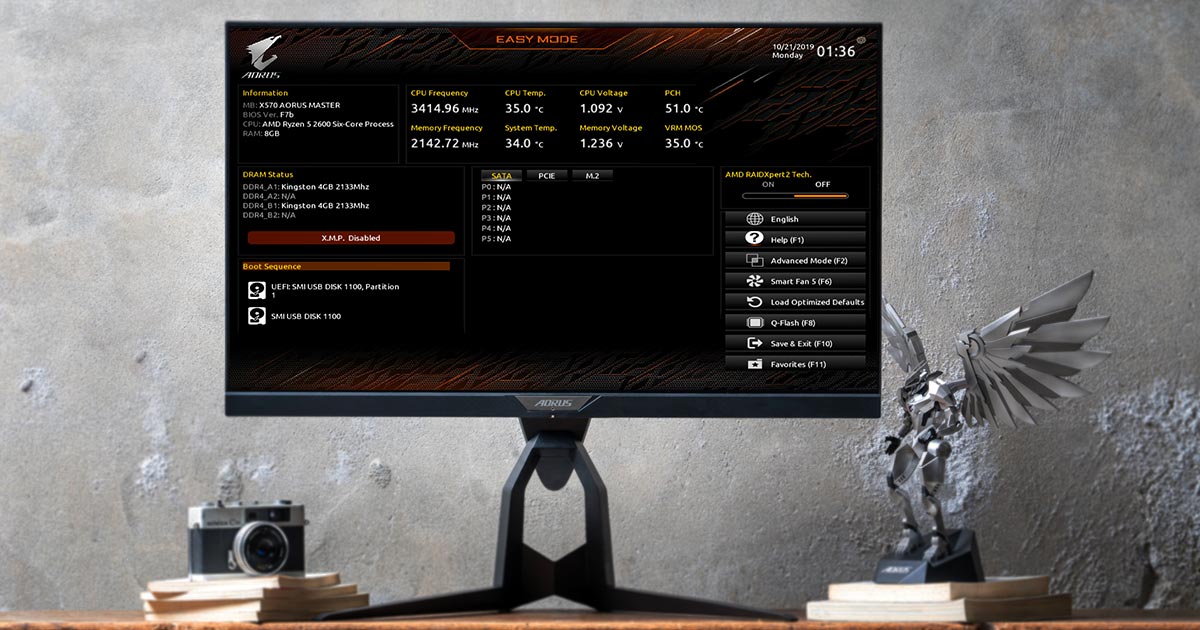
For a lot of users, the only time they’ve checked their BIOs might have been when the clerk at the PC store is showing them the BIOS settings for their new systems. Other than that, they might not even revisit the BIOS and tweak settings after. They may find it too complicated to use so they don’t even bother with it. However, ever since the launch of UEFI, many manufacturers have designed an Easy Mode that makes using the BIOS even more intuitive. For novice users, it’s time to throw away the idea that tuning the BIOS is only for hardcore users!
GIGABYTE is dedicated to optimizing the BIOS user experience in ways such as adding support for multiple other languages with its default English interface or adding more functions in general. This time around, after collecting and listening to user feedback, GIGABYTE has redesigned its new BIOS to make it substantially more user friendly.
Let’s take a look at the new changes to the interface!

The Classic BIOS design adds new languages support and mouse enabled functions, making the BIOS more user friendly.
1. Difference between new and old Easy Modes
Most manufacturers have two different BIOS modes, the familiar Classic mode and a simplified mode for standard users. Even experienced users, however, may enjoy using the simplified mode at times because the simplified mode consolidates a lot of essential information that users can view in a glance. Users don’t have to scroll through so many items to get to the information they need. This is great for less experienced users.
Although Easy Mode has always been easy to use for users, GIGABYTE continues to make it even easier than before. The new Easy mode enlarges icons, text, and works with 16:9 resolution instead of just 4:3 resolution, so the user can read the information much more clearly.
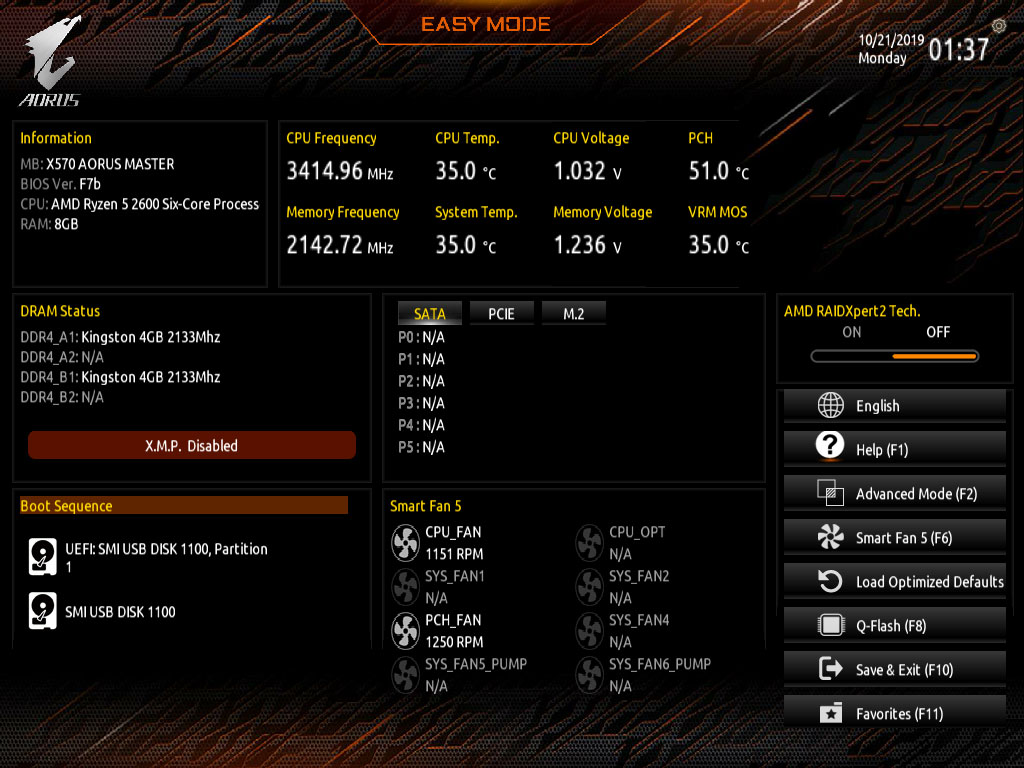
The new 2019 update of the Easy Mode, cleans up the interface visually so that users can quickly get the information they’re looking for.
2. Differences between old and new Advanced modes
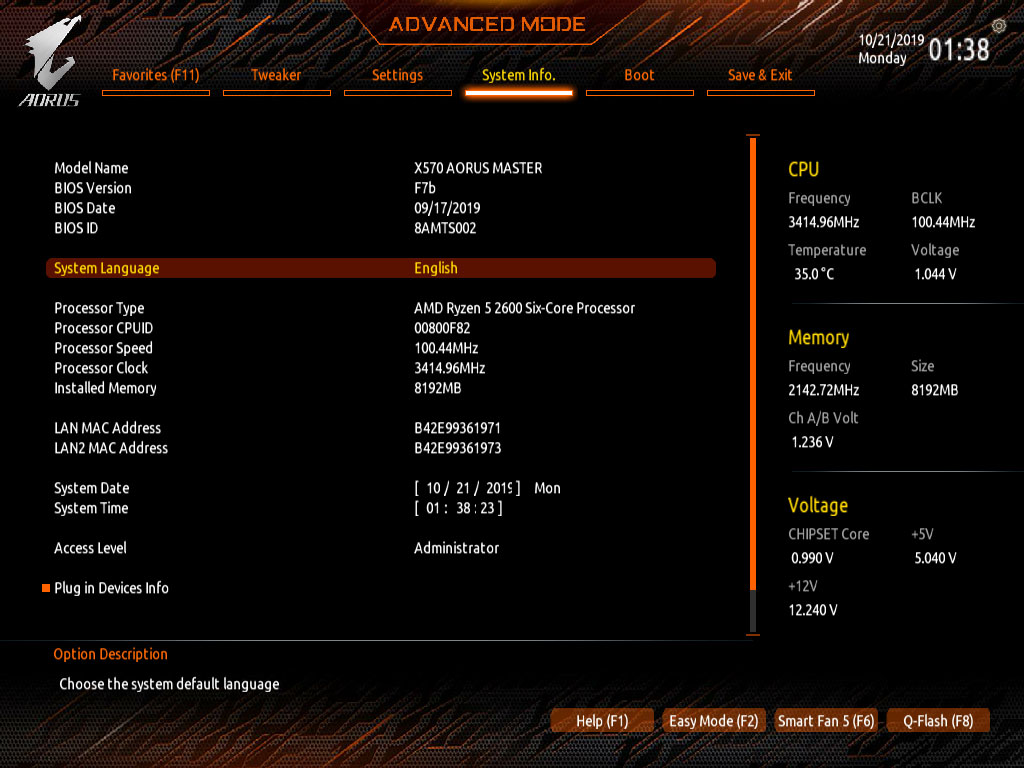
The interface for Advanced mode has also been revamped. One of the biggest differences that might stand out to those familiar with the older BIOS versions is that the M.I.T, System, BIOS, Peripherals, Chipset, Power, Save&Exit tabs have been renamed and their functions have been changed. The new tabs are Favorites(F11), Tweaker, Settings, System Info., Boot, Save&Exit, as the label count has been reduced from 7 tabs to 6 tabs. The My Favorites page has been moved to its own separate tab so users can add their favorite items/options to this tab. Users can quickly access this tab by pressing F11 and they can add/remove items by pressing the Insert key. Save yourself the trouble of scrolling through menus to find the items/options you’re looking for.
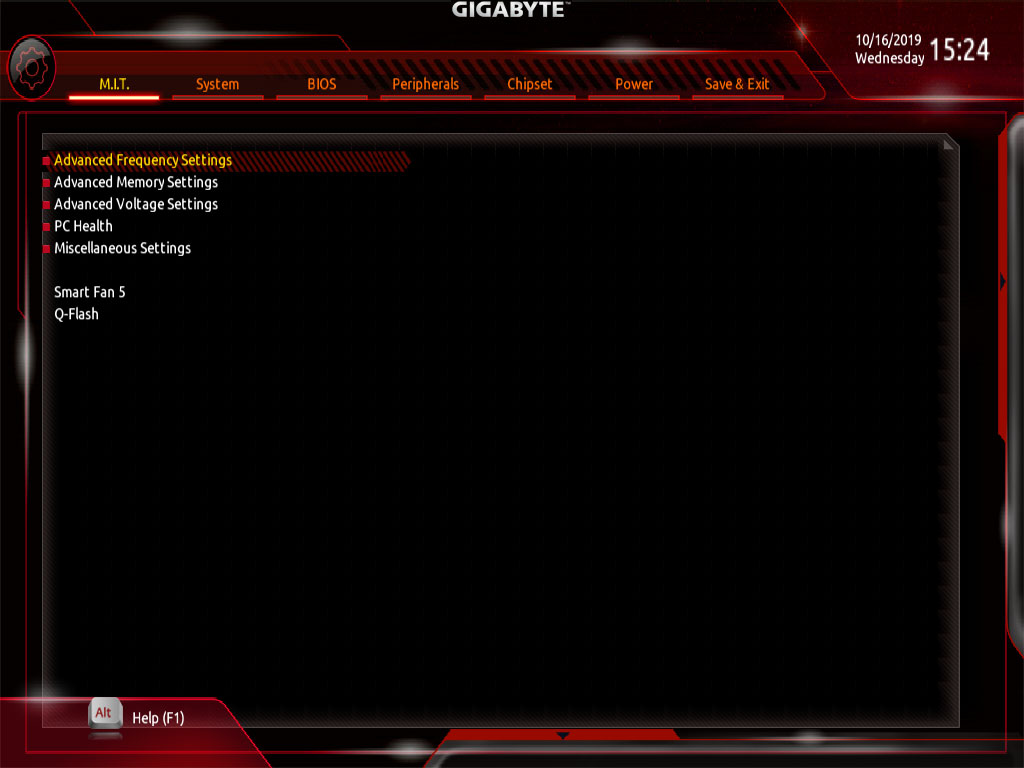
Old Interface
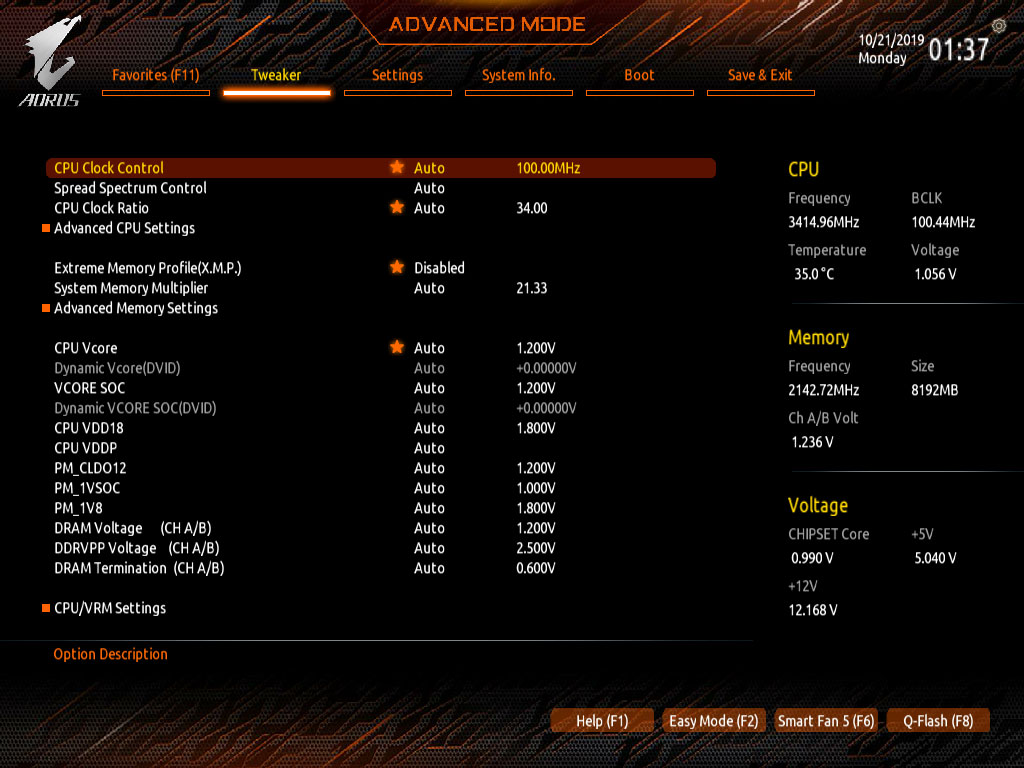
The biggest difference in the new interface is the label design

My favorites (F11) tab is simple and easy-to-use. Users can add/remove options from the preset options.
3. New Minimize Options
One of the design aspects of the newest BIOS which users will be pleased with is the ability to minimize the lists of options. This new BIOS interface design is much cleaner so that users won’t have to scroll through long lists of options.
For example, for the original CPU settings, the items listed took up the entire page and more so the users had to scroll through the menu to view all the items. The new design puts all the items on a single page so the user can view all the information at once.
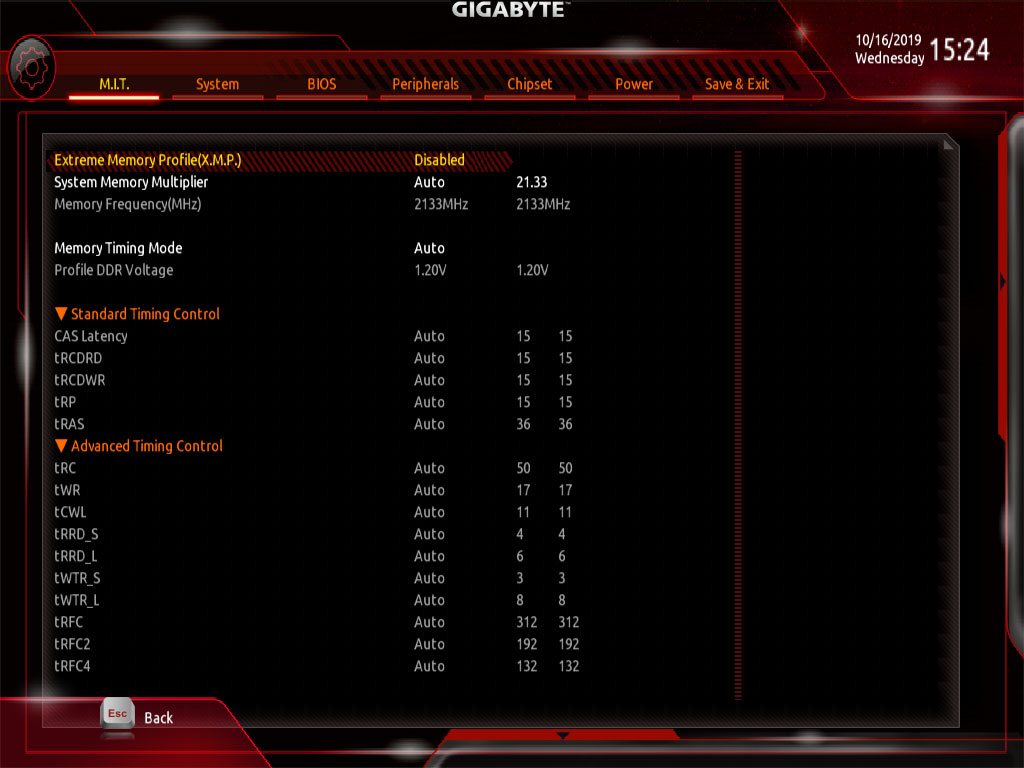
The previous design was too cluttered, the new version simplifies the design.
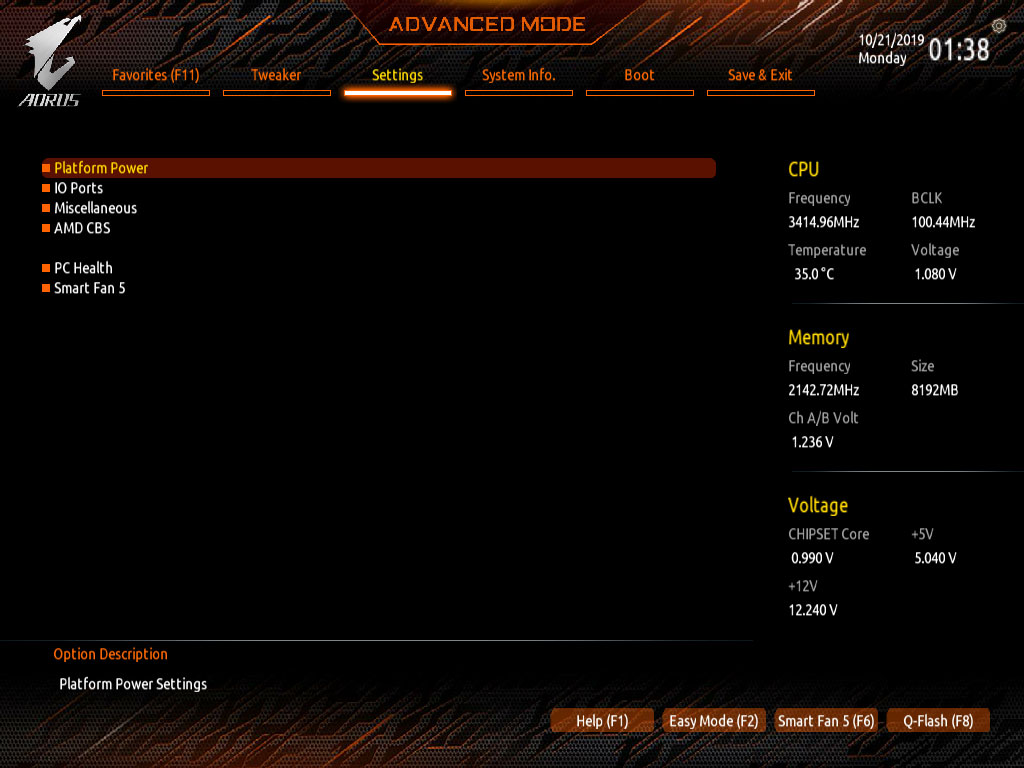
Asterisks in front of the minimize options let users know they enter the item to make more detailed adjustments.
4.Clearer and more detailed descriptions
Some of the descriptions for the items/options in the BIOS are sometimes not descriptive enough or are confusing to users. The new BIOS redesign comes with clearer and more detailed descriptions making the BIOS easier to use.
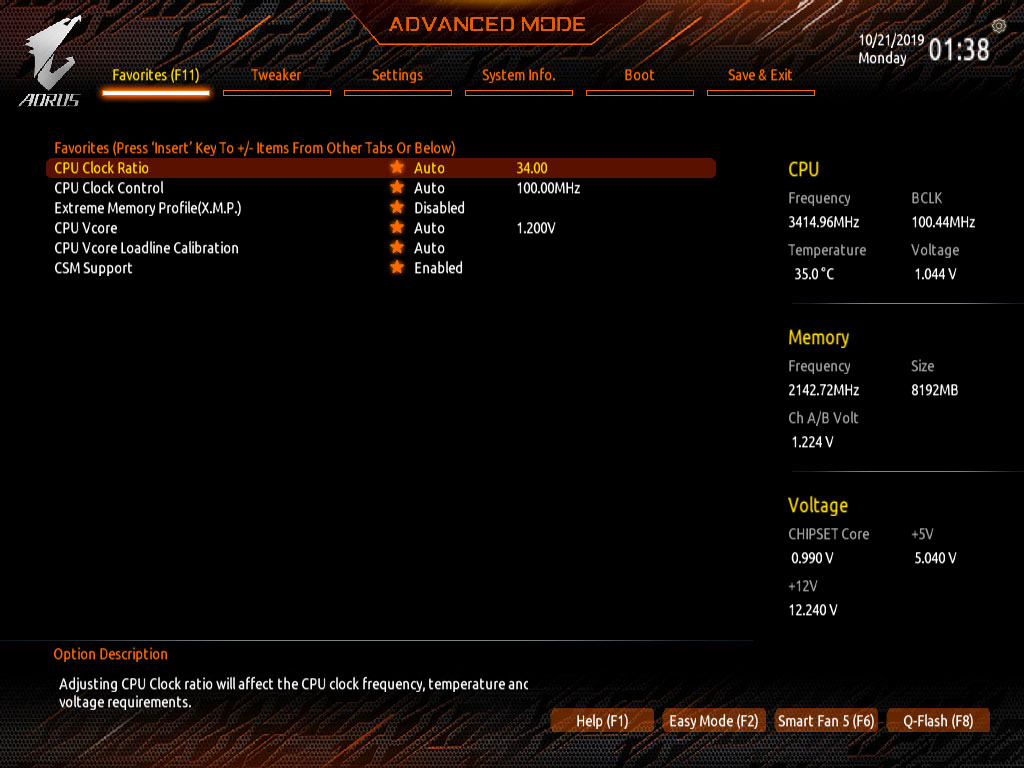
For more sophisticated items, the help information has been updated (recommendations enabled)
5. Optimized the SPD information window
SPD (Serial Presence Detect) indicates that there is an EEPROM on the memory module which records relevant information of the memory module. The memory module has SPD so the system doesn’t need to detect it when it’s turned on as the system directly reads the data for the memory particle, capacity, speed, voltage, manufacturer, etc. in the SPD. In addition to reducing the boot time, it can ensure that the set memory parameters are normal and more stable.
With the old BIOS design, the user needed to use software to read the SPD information of the memory. The new BIOS allows the information to be read in real time whereas before it was a hassle to do so. Now all you got to do is press Ctrl+S to bring up the SPD information window to check the memory module details and you can even check the X.M.P. information.
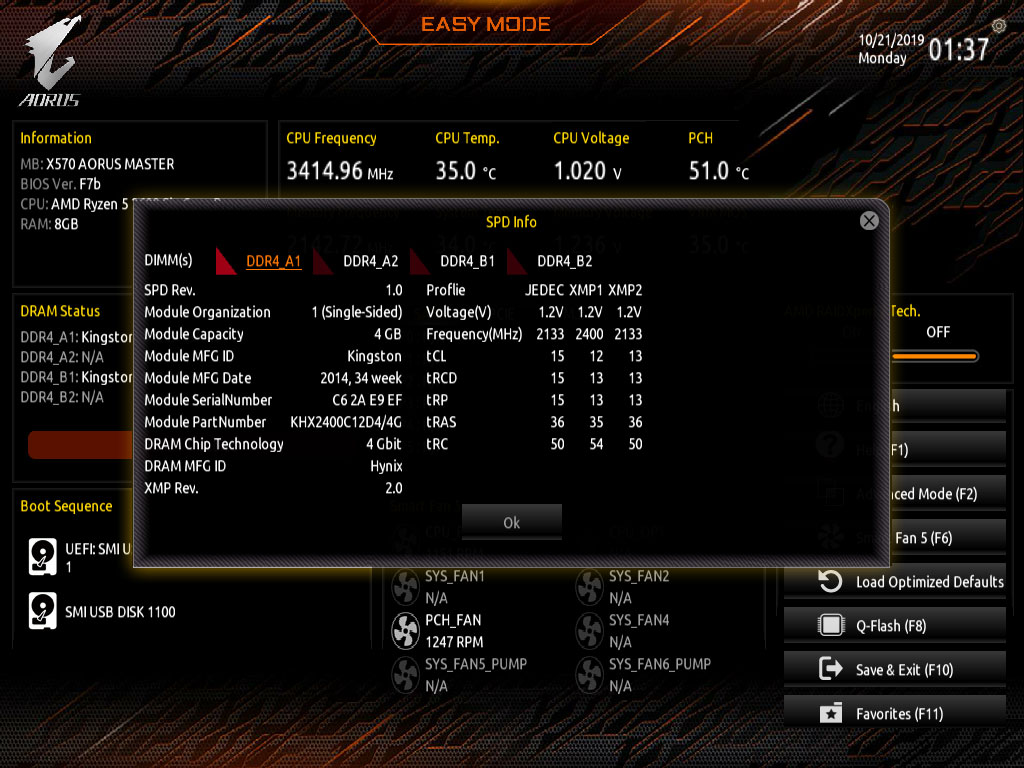
Want to quickly check your memory specsc? Just press Ctrl+S to access the SPD window and even the X.M.P. information.
6. The BIOS background is no longer the same
Depending on the motherboard, the BIOS background is no longer the same. This is one of the biggest differences with GIGABYTE 2019 BIOS redesign. For example on the AORUS motherboard, the AORUS icon is shown on the top left hand side of the interface in HD. On other boards, the logo will not show up and the colors are different so users can see the difference in tier of board.

AORUS motherboards and entry level motherboards have different styled BIOS backgrounds.
7. Other Changes
This huge BIOS redesign comes with other subtle improvements. If the user sets a CPU multiplier that is too high, like 999 for example, the value entered will not be accepted and will default to 27. If the user sets it at 0, the new BIOS will set it to Auto.
The new BIOS also deletes blank fields and removes greyed out options to make the design more clear and easy to use.
After looking at the preview for the new BIOS redesign, configuring BIOS isn’t that hard right? GIGABYTE has worked tirelessly to design a BIOS that is intuitive for both novice as well as experienced users. Come check out the new BIOS!

